

How to Change SSH Port in Linux (And Why Port 22 Is a Security Risk)
Let me ask you something.
You just set up a fresh Linux server. You’ve installed your software, configured your stack, maybe even patted yourself on the back a little. But did you check which port SSH is running on?
If the answer is Port 22, your server is already under attack. Right now. As you read this.
I’m not being dramatic. I’m being honest — because most guides skip this part. They show you how to set up SSH but never warn you that leaving it on Port 22 is like handing your server’s address to every bot on the internet.
This guide fixes that. We’ll cover why Port 22 is a genuine risk, and then walk you through exactly how to change your SSH port — step by step, safely, without locking yourself out.
First, Why Is Port 22 Such a Big Deal?
Port 22 is the globally standardised default port for SSH (Secure Shell). That’s been true since 1995. Every sysadmin knows it. Every firewall tool defaults to it. And unfortunately, every malicious bot on the internet targets it.
The second your server gets a public IP address, automated scanners start probing Port 22. We’re talking about botnets running around the clock, cycling through millions of IPs, hammering Port 22 with login attempts using common usernames like root, admin, ubuntu, and massive password dictionaries.
How bad is it, really?
Security researchers who monitor honeypot servers consistently report thousands of brute-force attempts per day — all directed at Port 22. Some high-exposure servers see over 100,000 attempts in 24 hours.
These aren’t targeted attacks. They’re automated. Indiscriminate. And they never stop.
What are they actually trying to do?
Gain root access — if you’re still using password-based auth with a weak password, you’re one dictionary entry away from a breach
Install malware or cryptominers — compromised servers are immediately put to “work”
Use your server as a launchpad — for spam campaigns, DDoS attacks, or pivoting deeper into your network
“So is changing the port really enough?”
No — and I’ll be upfront about that.
Changing your SSH port is security through obscurity. It doesn’t patch vulnerabilities or stop a determined attacker who runs a full port scan. But here’s what it does do: it eliminates virtually all opportunistic, automated bot traffic overnight. Bots are lazy. They scan Port 22, find nothing, and move on.
Think of it this way. You don’t need your front door to be impenetrable — you just need it to look less inviting than the next house. Combined with SSH keys, fail2ban, and firewall rules, a non-default port makes your server a much harder, much less interesting target.
What You’ll Need Before Starting
Don’t skip this section — seriously. These prereqs will save you from a headache (or a locked-out server).
- A Linux server — Ubuntu, Debian, CentOS, RHEL, AlmaLinux, or Rocky Linux all work
- Root or sudo privileges
- An active SSH session that you leave open throughout this process
- A terminal text editor you’re comfortable with — nano works perfectly
- (Optional but smart) A second terminal window is ready to test with
The Golden Rule of SSH Port Changes: Never close your existing session until you’ve tested and confirmed the new port works. Open a second terminal. Test first. Then close the old session. This rule has saved countless sysadmins from self-inflicted lockouts.
Step 1 — Pick Your New Port Number
Ports run from 0 to 65535. Here’s how to choose wisely:
The safe zone: Anything between 1024 and 65535 avoids conflicts with system-reserved ports.
Smart choices:
- 2200 — clean, rarely targeted, easy to remember
- 2222 — popular alternative, though increasingly scanned by smarter bots
- 49200 or similar (in the 49152–65535 range) — these “ephemeral” ports are almost never scanned
What to avoid:
- 8080, 3306, 5432, 6379 — these are well-known app ports and frequently scanned too
- Any port currently in use on your server
Check if your chosen port is free:
ss -tlnp | grep 22516
No output? You’re good. Something returned? Pick a different number.
Step 2 — Backup your SSH Config File. As Precaution is better than a cure
use following command:
sudo cp /etc/ssh/sshd_config /etc/ssh/sshd_config.bak
Step 3 — Edit the SSH Config File
The SSH daemon reads its configuration from /etc/ssh/sshd_config. This is the file we need to edit.
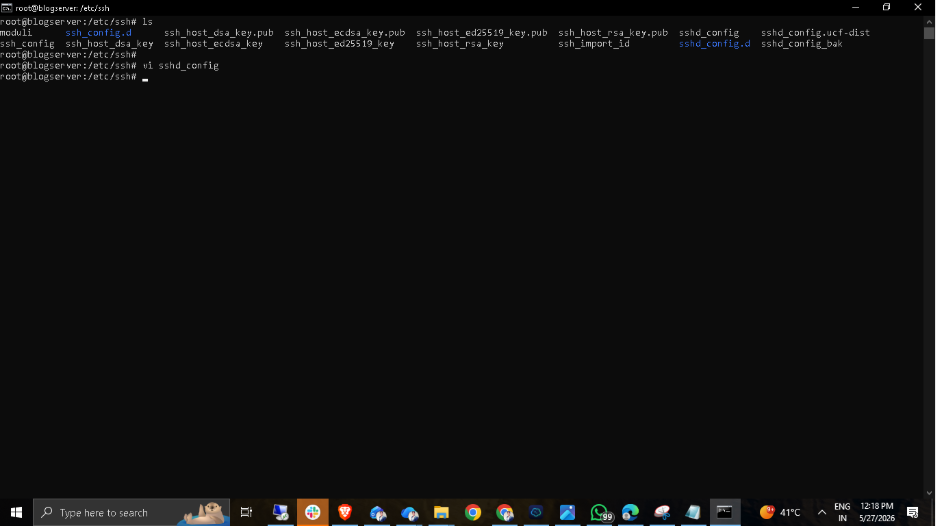
Open it:
sudo nano /etc/ssh/sshd_config
Scan through the file and find this line — it’s usually near the top:
#Port 22
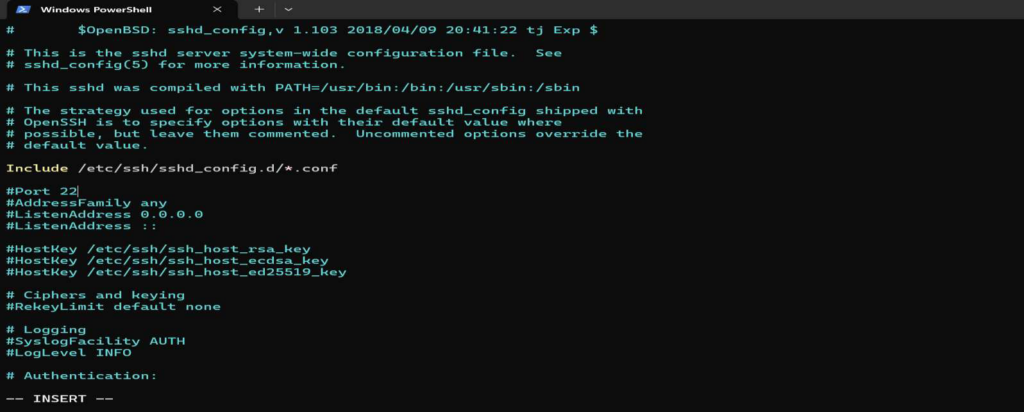
The # means it’s commented out, and SSH is using 22 as the default. Remove the # and replace 22 with your new port:
Port 22516
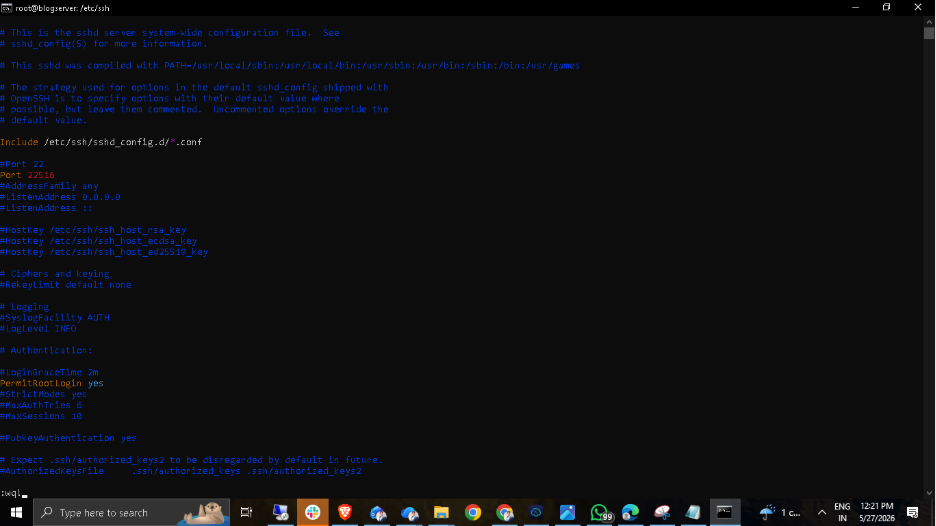
Pro move — run both ports temporarily:
Before you commit, add a second Port line so SSH listens on both ports at once. This gives you a safety net to test the new port without losing your existing connection:
#Port 22
Port 22516
Once you’ve confirmed the new port works, you’ll come back and remove the Port 22 line.
Save the file: Ctrl + X → Y → Enter
Step 4 — Open Your New Port in the Firewall
Here’s where a lot of guides fail you — they tell you to restart SSH and skip this step entirely. That’s how people get locked out.
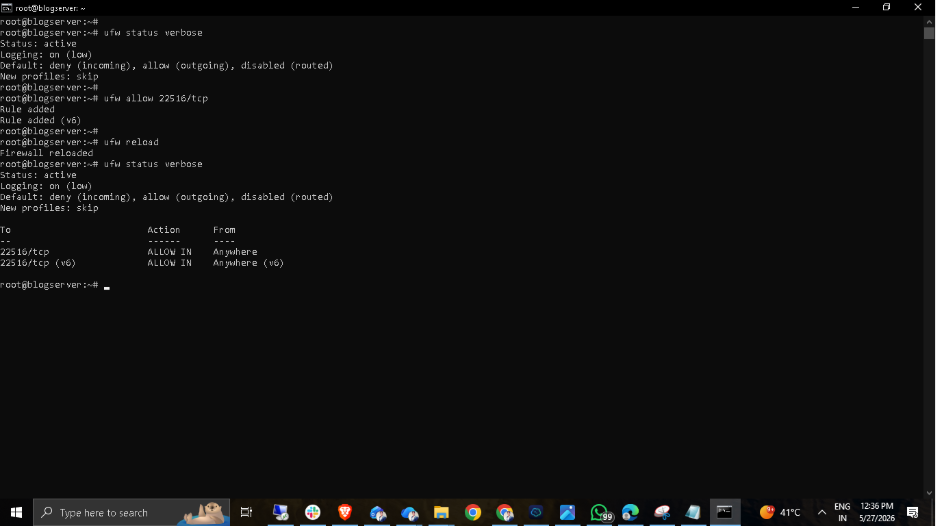
Your firewall is probably blocking the new port right now. Fix that before restarting anything. If you’re on Ubuntu or Debian (UFW):
sudo ufw allow 22516/tcp
sudo ufw reload
sudo ufw status
Look for 2200/tcp in the status output with ALLOW . If you see it, you’re set.
If you’re on CentOS or RHEL (firewalld):
sudo firewall-cmd –permanent –add-port=22516/tcp
sudo firewall-cmd –reload
Confirm:
sudo firewall-cmd –list-ports
If you’re using raw iptables:
sudo iptables -A INPUT -p tcp –dport 22516 -j ACCEPT
sudo service iptables save
Step 5 — Verify the SSH Configuration Syntax
Test the SSH configuration for any syntax errors:
sshd -t

- If the output is empty, the configuration is correct.
- If you see any errors, fix them before proceeding.
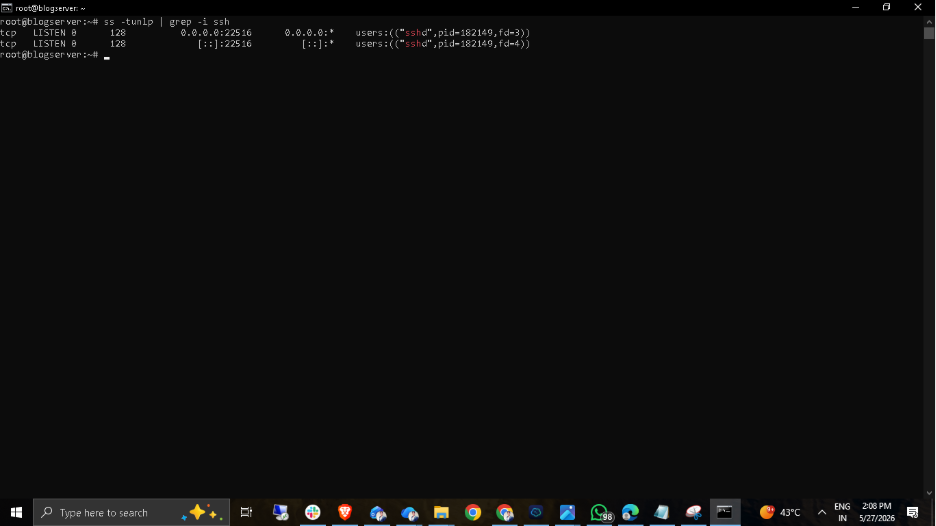
Verify the New SSH Port is Listening
Check that the SSH daemon is listening on the new port:
ss -tunlp | grep –i ssh
Note: You should see the new port (e.g., 22516) in the output.
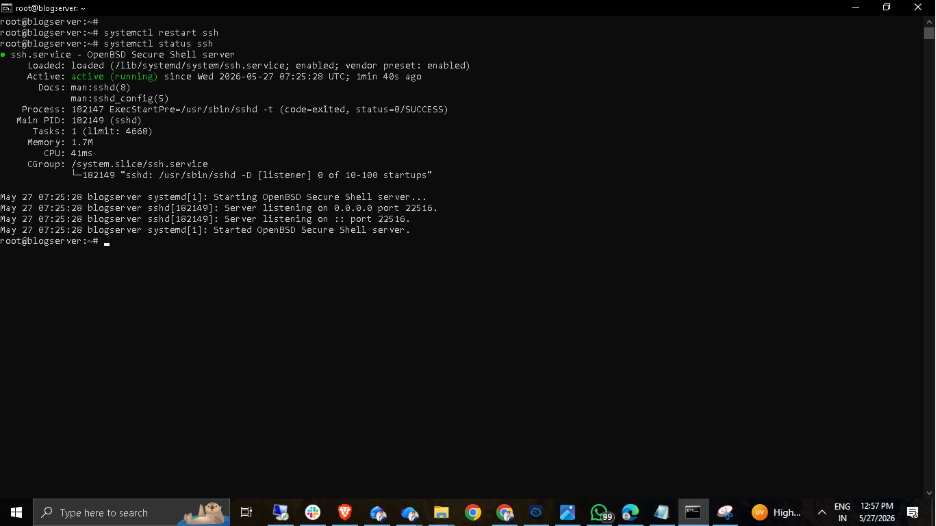
Step 6 — Restart SSH to Apply Changes
Now that your firewall is updated and your config is saved, restart the SSH service:
Ubuntu/Debian:
bash
sudo systemctl restart ssh
CentOS/ RHEL
bash
sudo systemctl restart sshd
Then immediately check that it’s running without errors:
bash
sudo systemctl status sshd
You want to see: Active: active (running)— in green. If you see anything else (failed, dead), stop here and check the troubleshooting section below before doing anything else.
Step 7: Verify the New SSH Port is Listening
Check that the SSH daemon is listening on the new port:
ss -tunlp | grep –i ssh
Note: You should see the new port (e.g., 22516) in the output.

Step 8: Test the New Port RIGHT NOW
Before you do anything else — open a new terminal window and try connecting on the new port:
ssh root@<IP_ADDRESS> -p 22516
Note: Do not close your original SSH session until you have successfully logged in via the new port. This prevents being locked out if something goes wrong.

If it works: Perfect. You’re in. The new port is live. Keep your old session open for just a moment longer.
If it doesn’t work: Do. Not. Close. Your. Old. Session. Go back through Steps 2–5 and check your work. The old session is your lifeline until this is resolved.
Quick Reference Checklist:
- Update firewall rules based on the firewall service in use (firewalld, ufw, CSF, iptables, cloud firewall, etc.).
- Allow the new SSH port before restarting the SSH service.
- Keep the current SSH session open until the new port is tested successfully.
- If SELinux is enabled, allow the new SSH port in the SELinux policy.
- Verify the selected port is not already in use.
- Test SSH access from another terminal before logout.
- Keep a backup of the SSH configuration file for rollback.
- Use additional security measures like SSH keys, Fail2ban, and disabling root/password login.
Wrapping Up:
Here’s the honest truth: changing your SSH port is a small thing that makes a big difference. It takes about five minutes. It requires no special skills. And it immediately eliminates the vast majority of automated attacks your server would otherwise face every single day. It’s not a silver bullet. Nothing in security ever is. But paired with SSH key authentication, fail2ban, and sensible firewall rules — it’s a foundation you can actually trust.
At Hapih Host, this is one of the first things we recommend to every client who spins up a new VPS or dedicated server. Small habits like this are what separate servers that stay secure from the ones that quietly get compromised at 3 am.
You’ve got this. Go change that port.