×

Archive

How to change nameserver (DNS) Bigrock to Hapih Host

Nameserver Updation – In order for your domain name to resolve (point) to your web hosting account (and therefore your website), you will need to update the DNS for your domain. This typically involves updating the name servers (DNS) your domain is using.

Coming to the point This Blog will guide you how to change easily your Bigrock Nameservers (DNS) by pointing them to a new web hosting provider, in this case to Hapih Host.

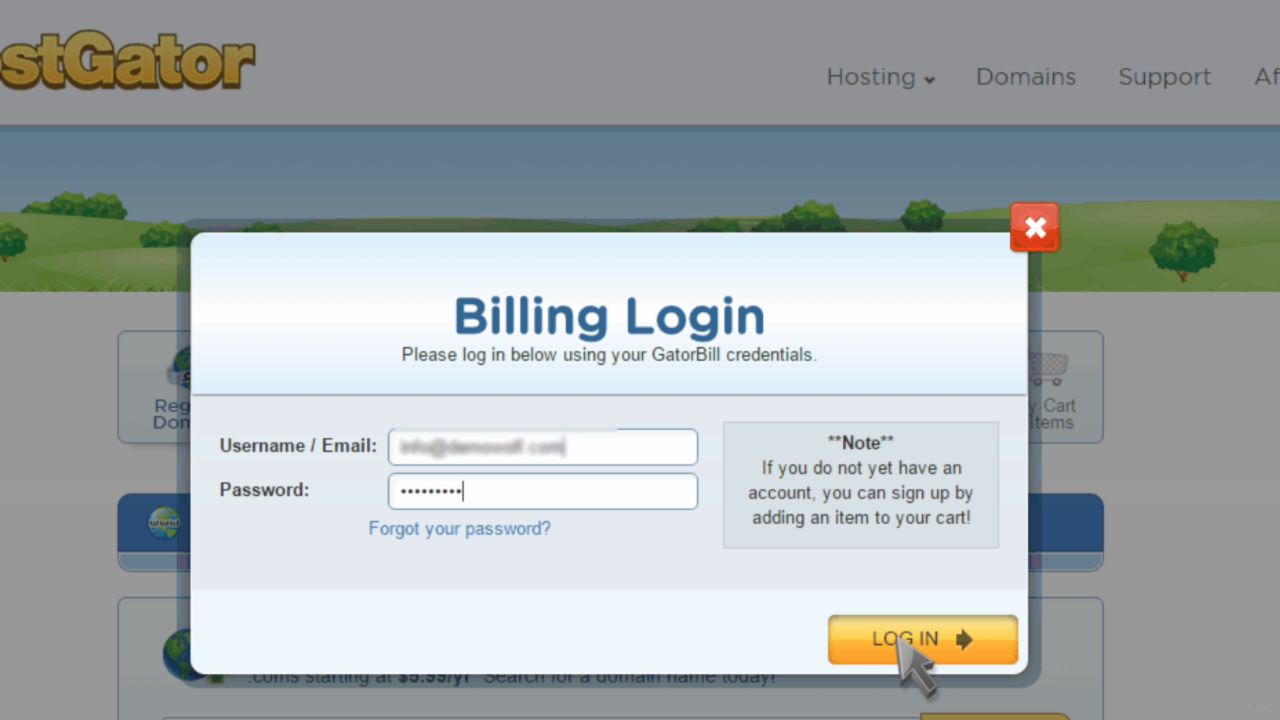
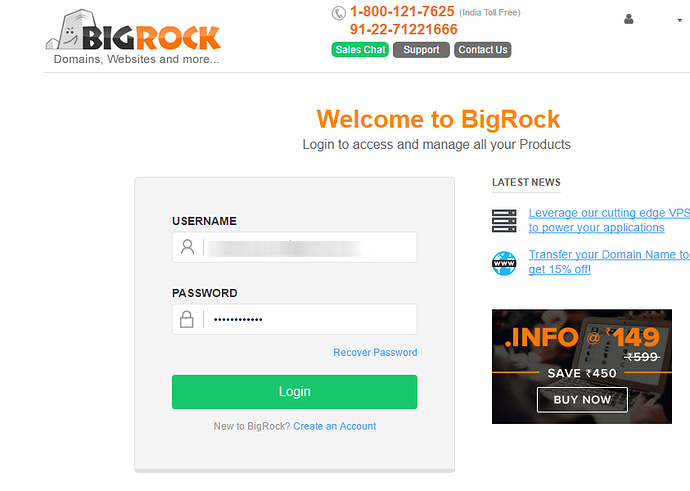
Step 1: Login to your BigRock account

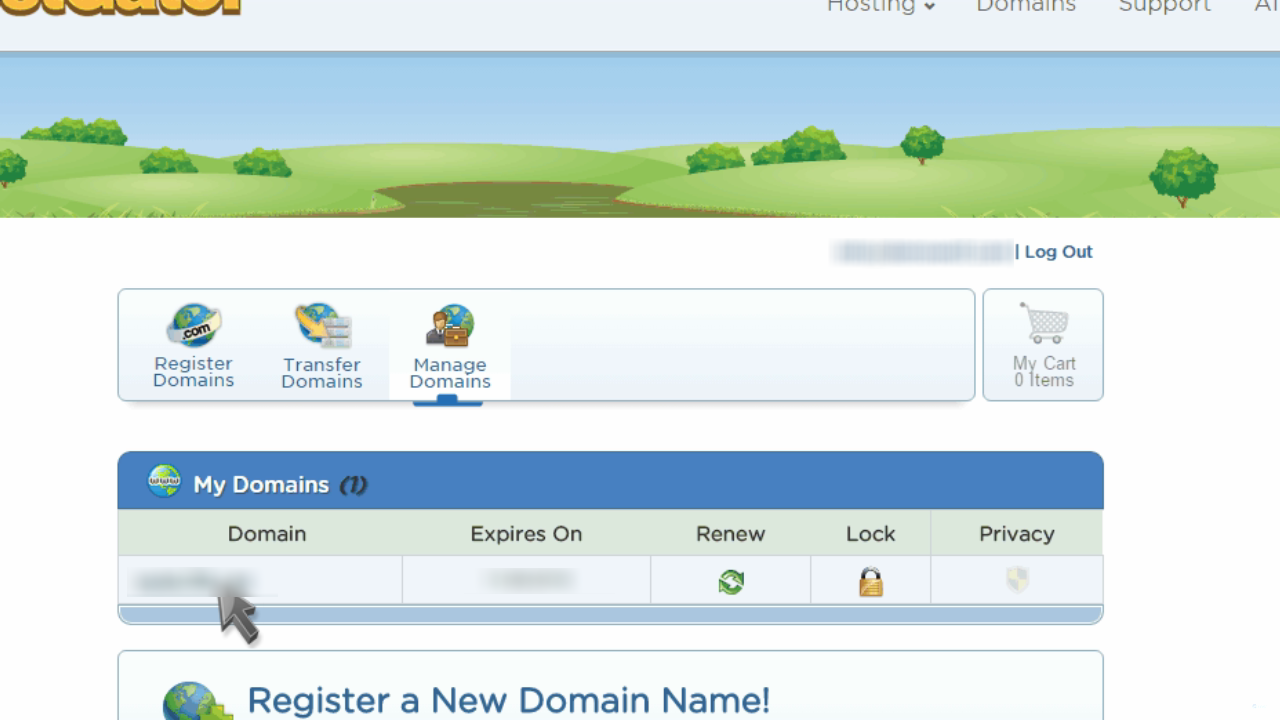
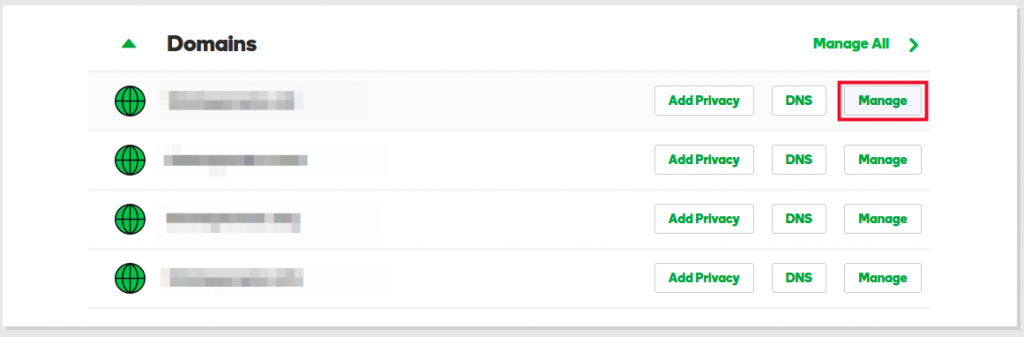
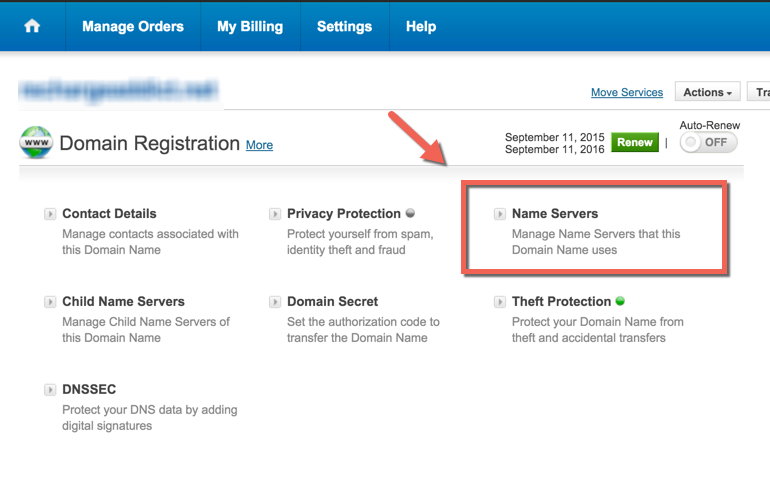
Step 2: And then you would see all the domain which you have purchased. Click on the Domain name which you want to point to any other hosting (In our case it’s Hapih Host).

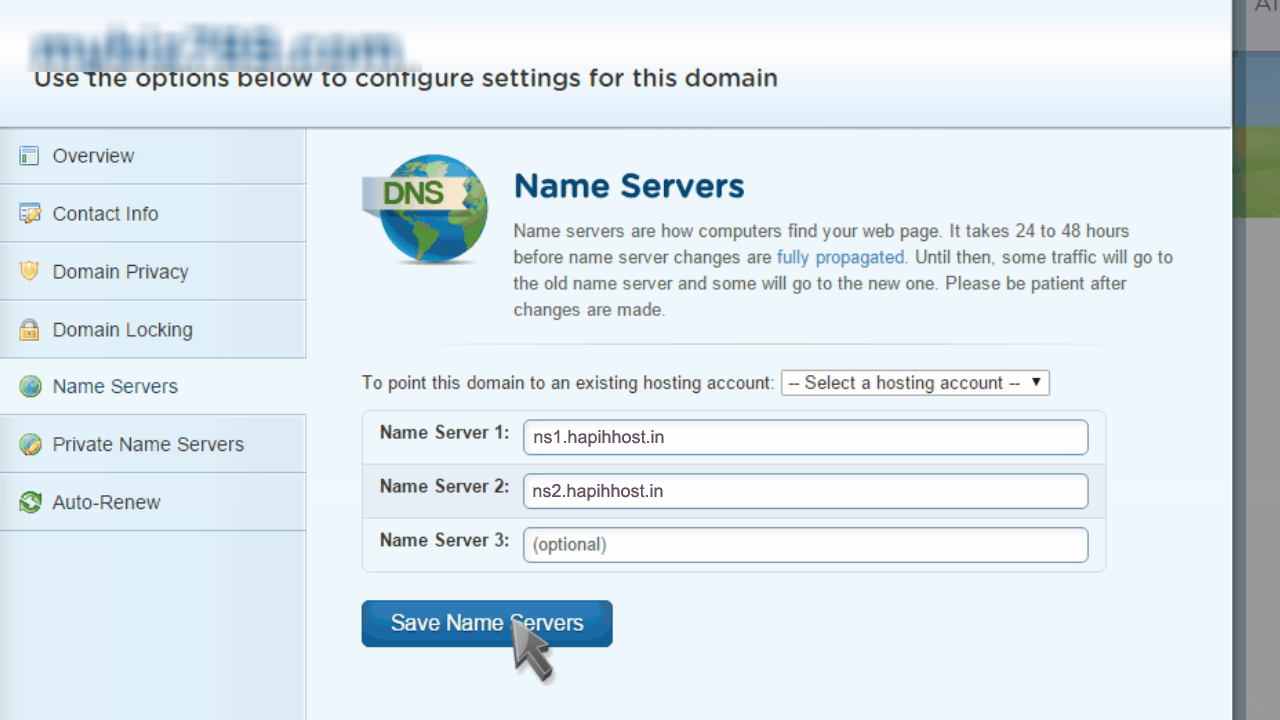
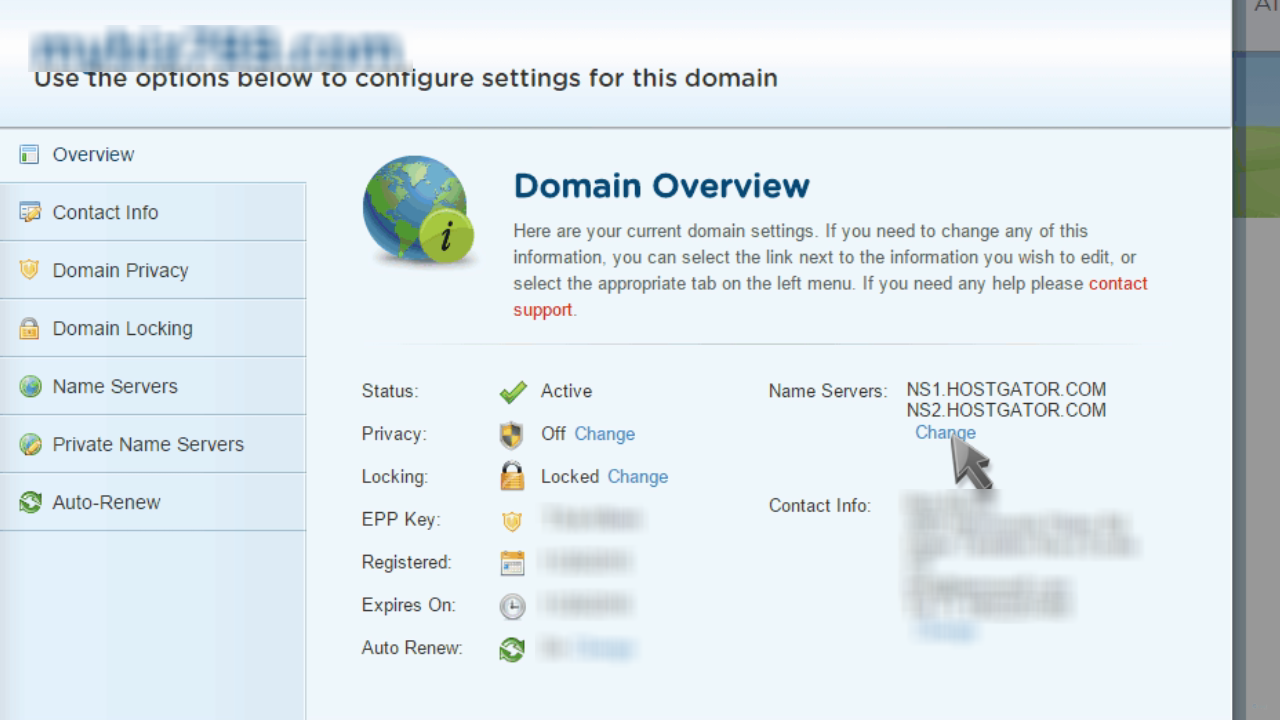
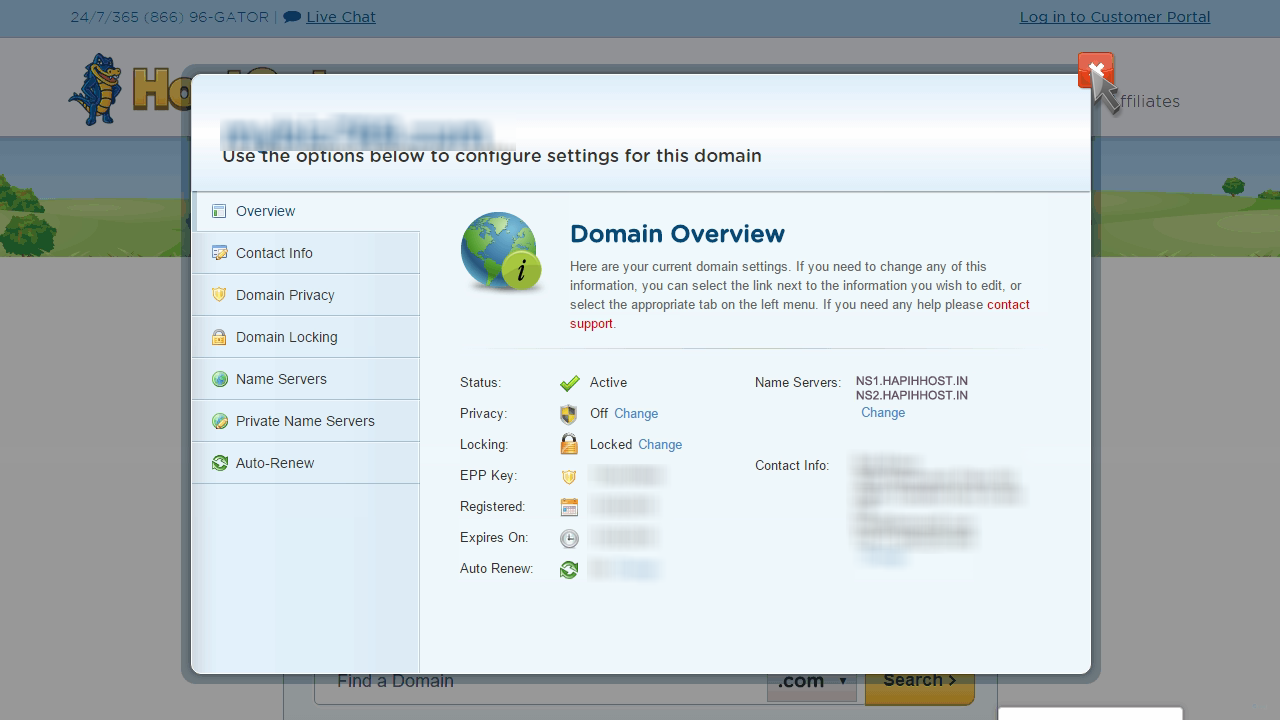
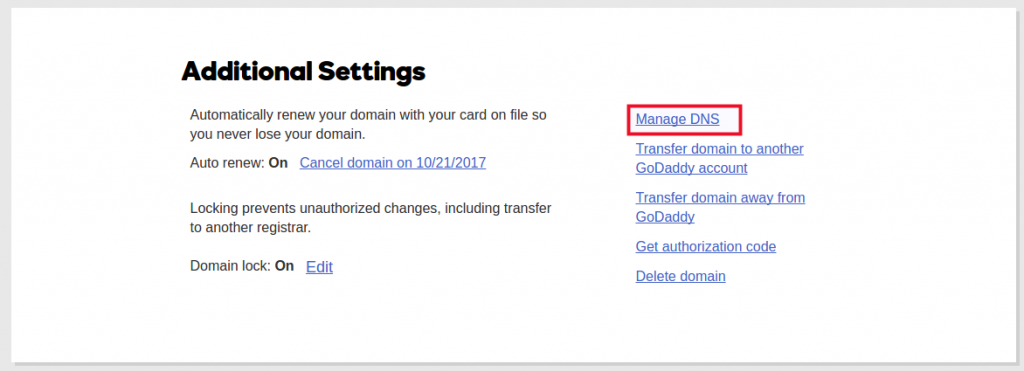
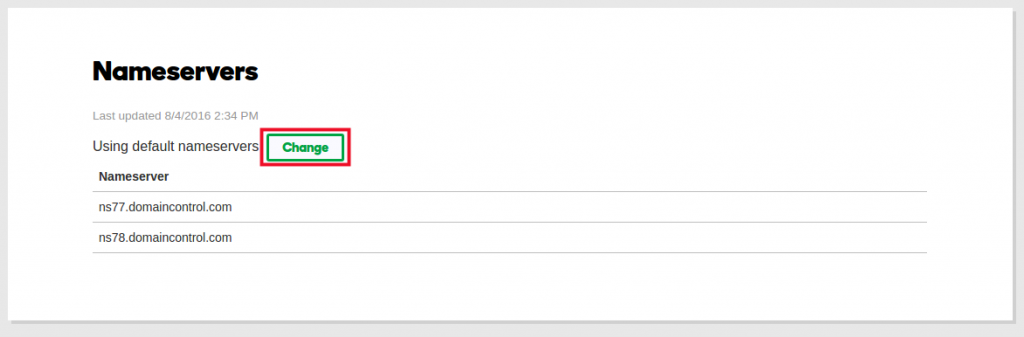
Step 3: Now clicking on “Name Server” will bring up a pop-up & you need to replace the existing nameserver with your hosting name-server

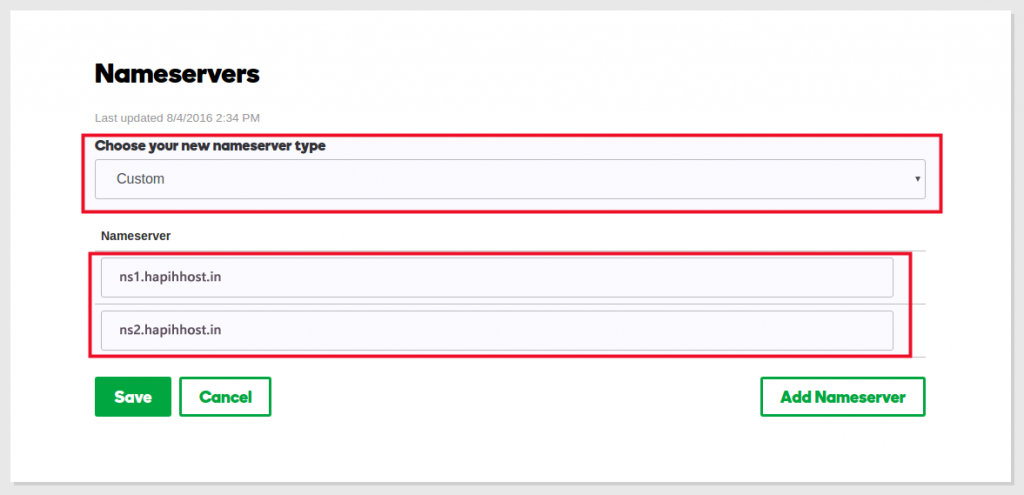
Step 4: Remove the existing Bigrock name servers and update it with Hapih Host name servers

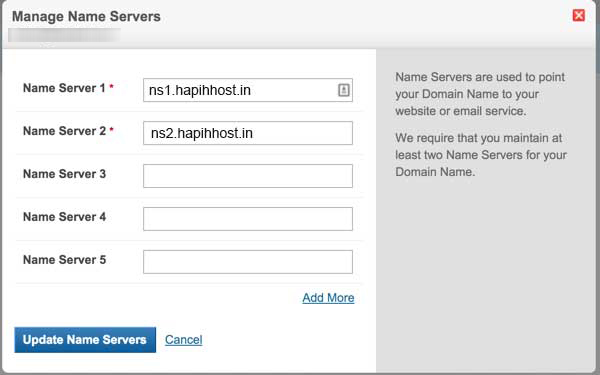
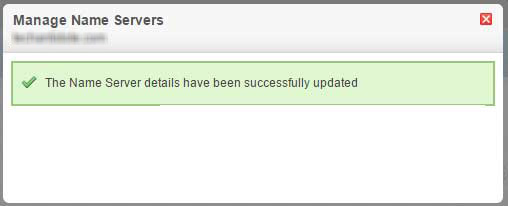
Step 5: Click on Update name servers & your nameserver will be updated instantly. Do remember, even after nameserver change, it may take up to 4 hours for your new site to work.

How to change nameserver (DNS) HostGator to Hapih Host

Name servers are essential addresses for a server which you can use to point a domain to the desired server. If you registered a domain with a new hosting package, the domain should already be pointed to the proper Hapih Host servers.

Now This Blog will guide you how to change easily your HostGator Nameservers (DNS) by pointing them to a new web hosting provider, in this case to Hapih Host.

Step 1: Go to http://register.hostgator.com and Click the “Domains” link in the main menu

Step 2: Click on the Manage Domains tab

Step 3: Login with your billing account email and password to access any domains

Step 4: Click on the desired domain name to get to the Domain Overview which will show more details about the selected domain and provide access to several other functions.

Step 5: Click the Name Servers tab from the left-hand menu.

Step 6: On the Name Servers page, edit the name servers which the domain will point to. And the click to “Save Name Servers”.

Step 7: And now the domain name’s nameservers have been updated.Please remember that nameserver changes can take 24 to 48 hours to propagate.

How to change nameservers (DNS) Godaddy to Hapih Host

This Blog will walk you through with a step-by-step guide of how to change your GoDaddy Nameservers (DNS) by pointing them away from GoDaddy and to a new web hosting provider, in this case to Hapih Host.

Step 1: Sign in your GoDaddy Account:

Step 2: Once logged into your dashboard select the domain you want to manage by clicking the Manage button:

Step 3: Under Additional Settings click Manage DNS:

Step 4: Scroll down to the Nameservers section and click Change

Step 5: Switch the dropdown from Default to Custom and under Nameservers fill in the Hapih Host Nameserver information: ns1.example.com and ns2.example.com The nameserver which you received in your registered email id with login details: